

I’m giving us all a break from My Happiness Commandments…so much introspection is a bit heavy and exhausting. But, I am enjoying every minute of it! To lighten things up a bit, I thought I would share the light fixture I made for Halle’s Tween Room Redo. This was one of the most rewarding projects we did…easy, inexpensive, and it added a bit of glam.
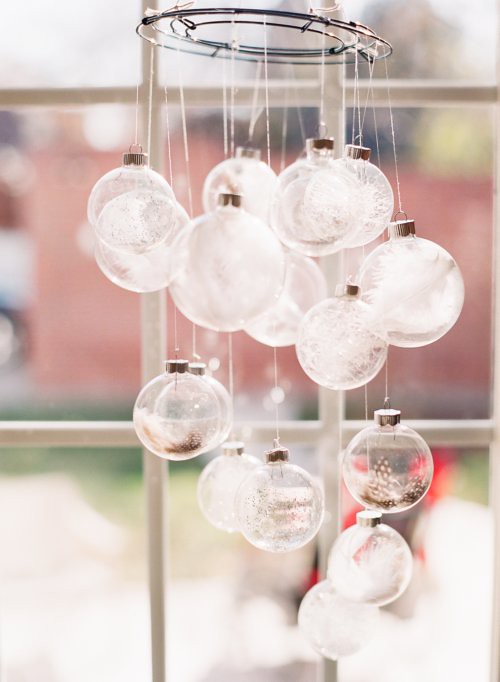
Bubbly Disco-Ball Chandelier
There are so many possibilities for this project. I chose clear glass because I wanted the light to shine through the balls, but colored might be fun too. I added the disco balls because what tween girl doesn’t love sparkly gold disco balls hanging from their ceiling? Lots of fun!

Inspiration from You Are My Fave and Twig Décor
My Change

Supplies:
*old light fixture, I got mine at ReStore
*ceiling medallion
*old ornaments, I used clear glass balls and mini disco balls
*fishing line
*gold leaf paint
*clear, round light bulbsTotal Cost: about $10; $5 for fixture + medallion and light bulbs
Directions:
1. Prepare your light fixture. Mine had rectangular glass plates hanging from each of the spokes on the light fixture. They had a little rubber piece that held them on, so I just removed the rubber tip and the glass plates came right off. This particular fixture did not have a piece to attach to the ceiling, so I just picked one up at Home Depot. I was going to paint it black, but decided that I liked the gold, so I left it. It is easy to spray paint a light fixture, though, so you could make it whatever color you want.
2. Prepare your ornaments. The ornament hangers at the top of mine were silver so I brushed them with a bit of gold leaf paint so they would blend better. I don’t mind mixing metals a bit, but I used lots of gold/brass in the room and the silver just looked funny. These could be painted any color as well.
3. Remove old light fixture and wire new one and attach to the ceiling. I know nothing about wiring, but Joe is great at it so he did it for me because he is that kind of a guy!
4. Add the ornaments. This was the fun part. I added ornaments to the light spokes with pieces of the fixture’s chain that we had cut off to make it higher. I pulled the chain apart with needle nose pliers, slipped an ornament on, and then bent the piece of chain in to create a hook.

Next, I used clear fishing line to hang the rest of the ornaments from various spots on the fixture, making sure that the spacing and heights were balanced, but not even.

5. Add the light bulbs. I used round, clear bulbs to blend with the rest of the chandelier, and to give a more direct light than a white bulb. Using these bulbs also makes for some fun and dramatic lighting at night…circle shadows on the ceiling and walls.
6. I wasn’t sure what to do with the tips of the fixture’s spokes…add the rubber tips or find something else. I was in Ikea’s clearance area and spotted the tiny gold ornaments on clearance for $.75, so I snagged them, took off the tops of the ornaments, and stuck them on the ends of the spokes. Done, and done! I love how light and bright and shiny it is.


This article gives the light in which we can observe the reality. This is very nice one and gives indepth information. Thanks for this nice article.
ReplyDeleteFlush Mount Lights